SKIP AHEAD TO:
Let’s Get Started!
1. Initiate Upterm Add-In Plugin for First Installation
>Head over to Device Details Page, and click on the Upterm Add-in tab.


>Click on the Install Upterm (under the Installation tab) in the Commands card, then click on the Execute button.
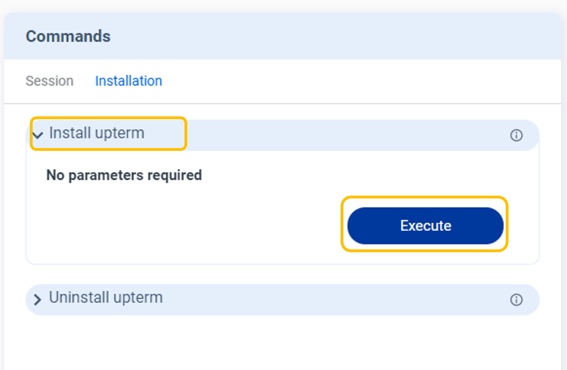 >Select devices to send command and click on the Execute button
>Wait for 1 minute for initiation, then click on the Done button.

2. Set Up Open Session
>Go to the Open session (under the Session tab) in the Commands card, then click on the Execute button.
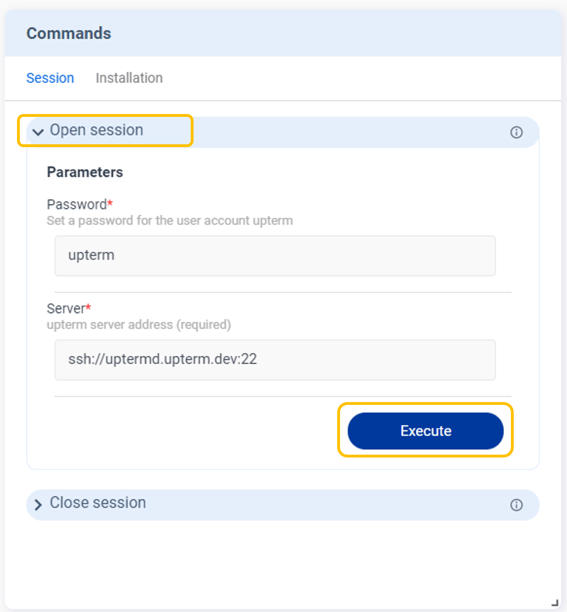

>Select devices to send command and click on the Execute button
>A secure SSH session will be generated in 1~2 minutes after the session is opened. When the process is done, click on the Done button.


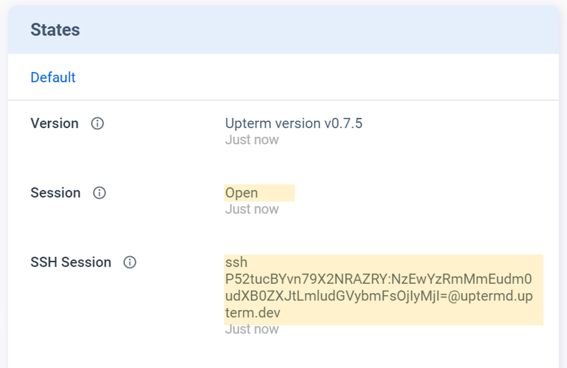
>The Session status will be updated to “Open,” and the URL of SSH Session will appear in 2~3 minutes in the States card.
3. Connect to SSH session
> Open terminal on your client machine.
>(Skip this step if you have done it before) Run the following commands to generate public/private key pairs by using the ED25519 algorithm.
-
-
Linux / Mac (Use Terminal)
ssh-keygen -o -a 100 -t ed25519 -f ~/.ssh/id_ed25519 -C "example@example.com"
- Windows (Use PowerShell)
ssh-keygen.exe -t ed25519
-
💡Tip:
Check the FAQ section for further instructions.
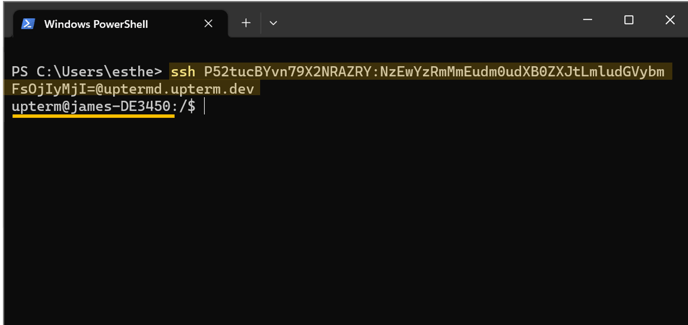
>Copy the URL of SSH Session shown in the States Card.
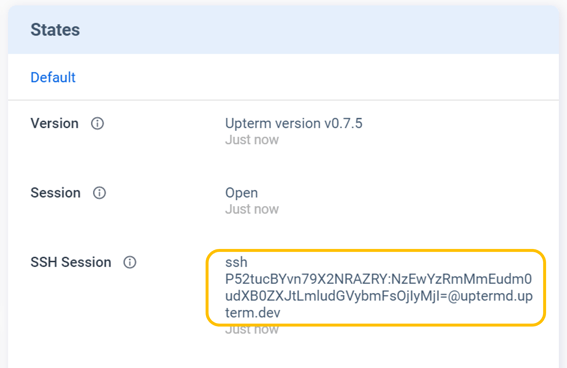
> Paste the URL in the local terminals. You will then see the terminal user switch to Upterm@.
You’re All Set!
FAQ
-
What is Upterm, and where can I learn more about it?
Upterm is an open-source solution for sharing terminal sessions instantly over the public internet via secure tunnels. You can visit Upterm official website or check out their Github repository for more information.
-
What should I do if I receive a "permission denied" response when trying to connect to session?
A permission denied means that the SSH connection has been established but the server is unable to validate the private key you are using locally against the correct public key.
Make sure that you have generated an ED25519 key pair successfully. If you are still experiencing the issue, it is possible that generating the key pair multiple times may have caused a problem with the public/private key pairing. In this case, you can try deleting the existing keys located in C:\Users\{Username}\.ssh directory (or ~/.ssh on Mac or Linux), and generate a new key pair again.
-
Could you show detailed instructions on ED25519 key generation?
In this example, we will demonstrate the detailed steps for running on Window Powershell.
- Open a PowerShell on your client.
- Run the command from Windows PowerShell.
ssh-keygen -t ed25519
- You will be prompted to specify a location to save the key pair. For this example, we press Enter to accept the default location (C:\Users\username/.ssh/id_ed25519)
Generating public/private ed25519 key pair.
Enter file in which to save the key (C:\Users\username/.ssh/id_ed25519): - Next, you'll be prompted to enter a passphrase to encrypt your private key files. For this example, we're leaving the passphrase empty.
Enter passphrase (empty for no passphrase):
Enter same passphrase again: - Once the keys have been generated, you will see output looks like below:
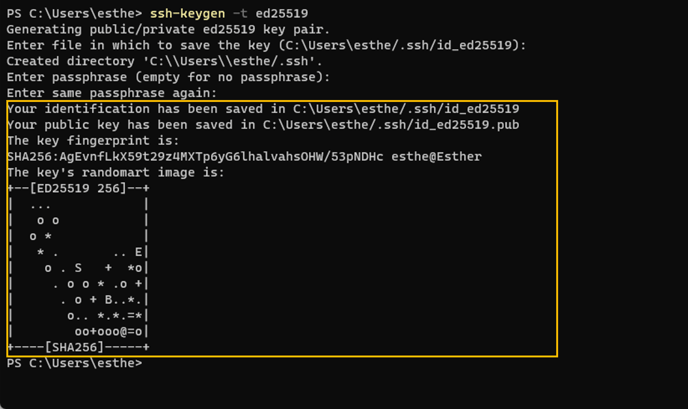
Your public/private ed25519 key pair has been generated and saved in the location specified.
