| Available for: Premium Plan |
Introduction
Allxon Add-Device Booster accelerates the device adding process by installing the Allxon Agent and pairing devices in one go. This acceleration is achieved by generating a unique token, serving as a group ID, to streamline the adding of devices to groups on Allxon Portal.
Step 1. Generate you Add-Device Booster Command
-
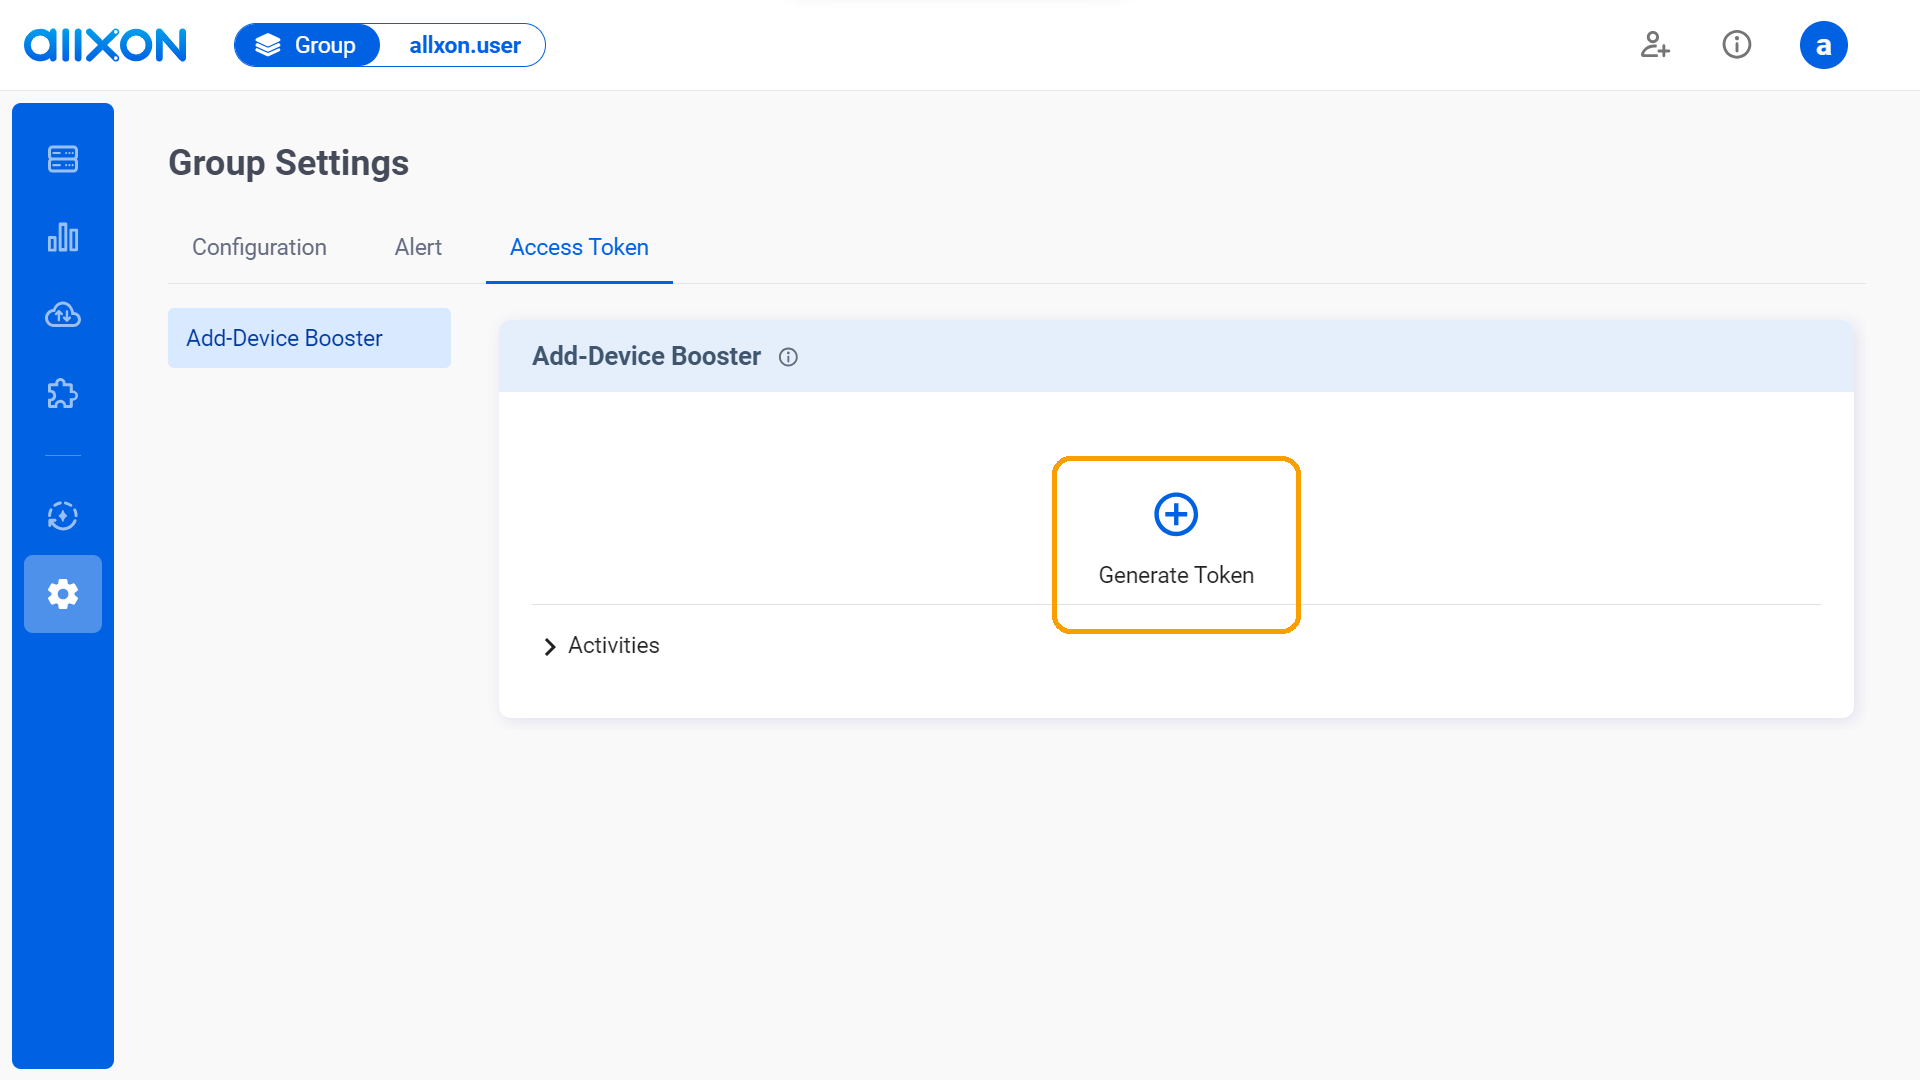
- Navigate to the Access Token Tab, select the Add-Device Booster card, and click on the + button to generate a token.
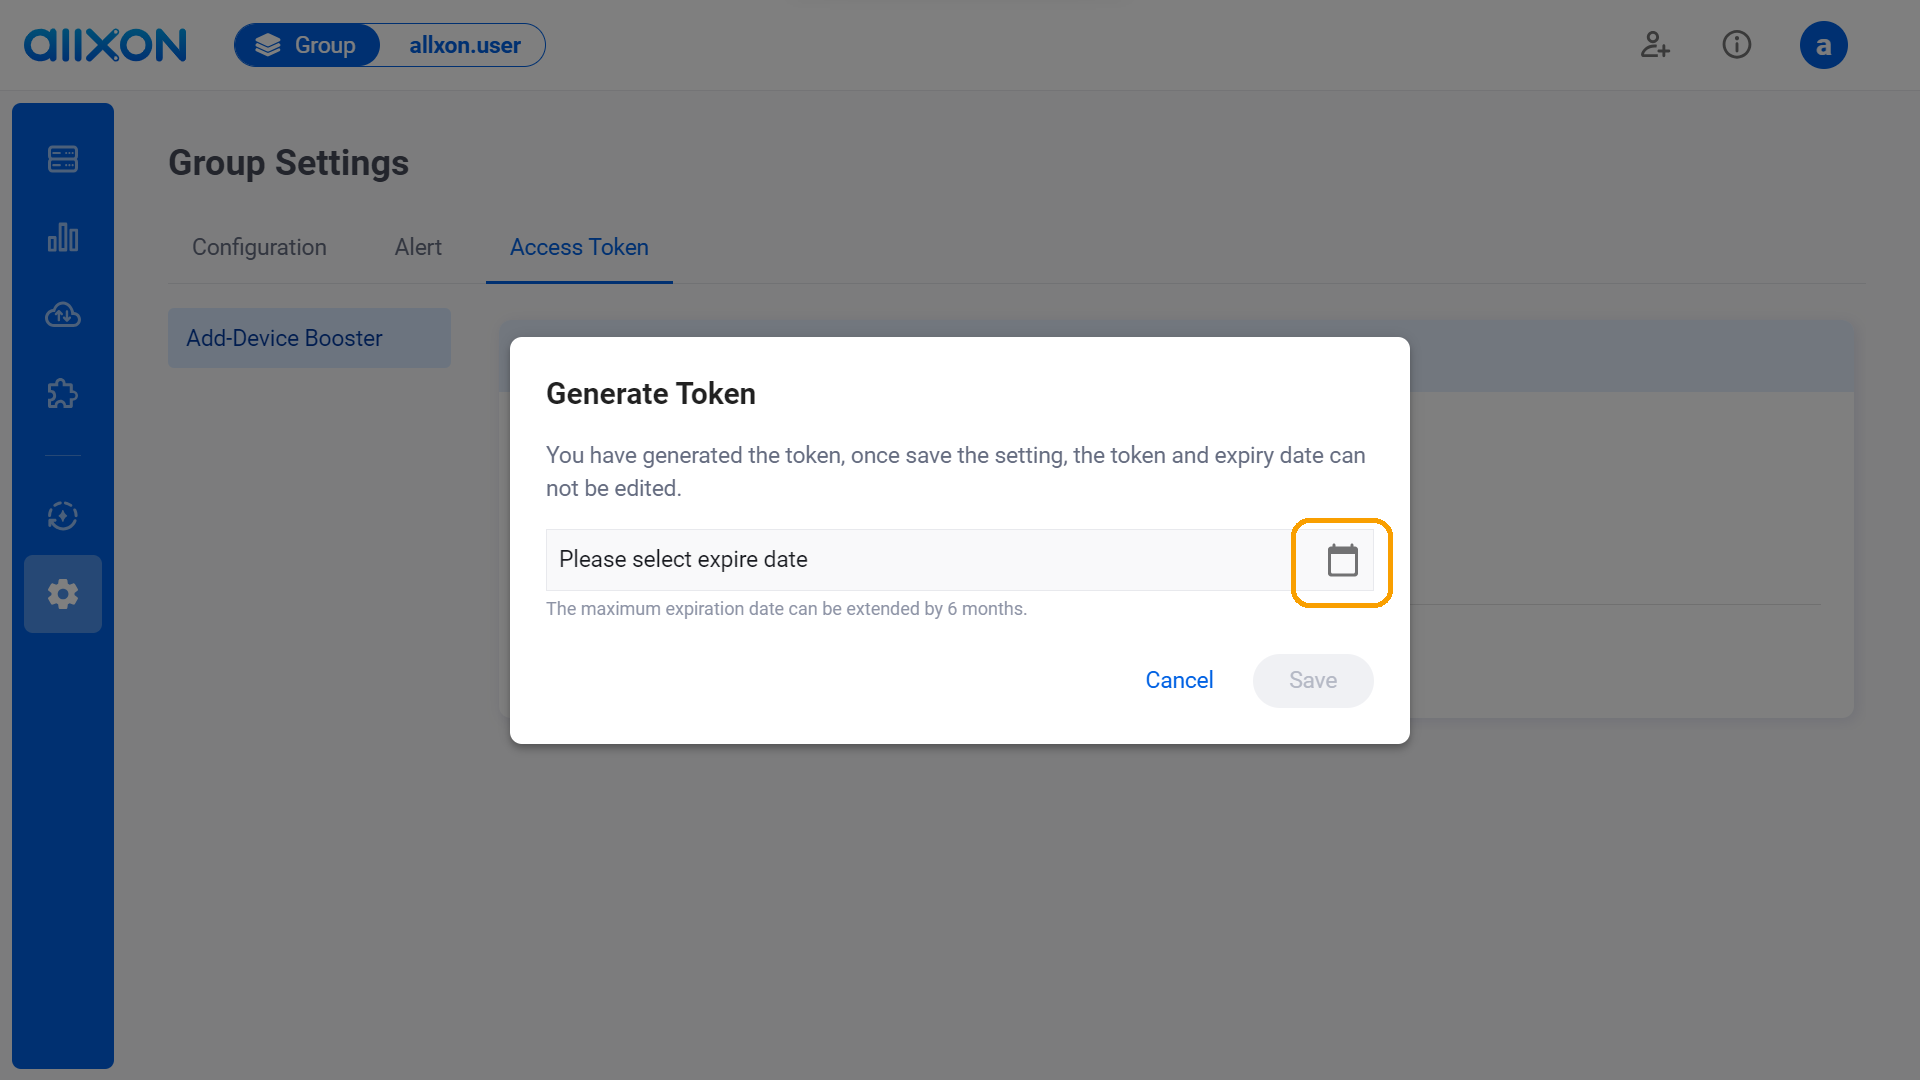
- Click on the
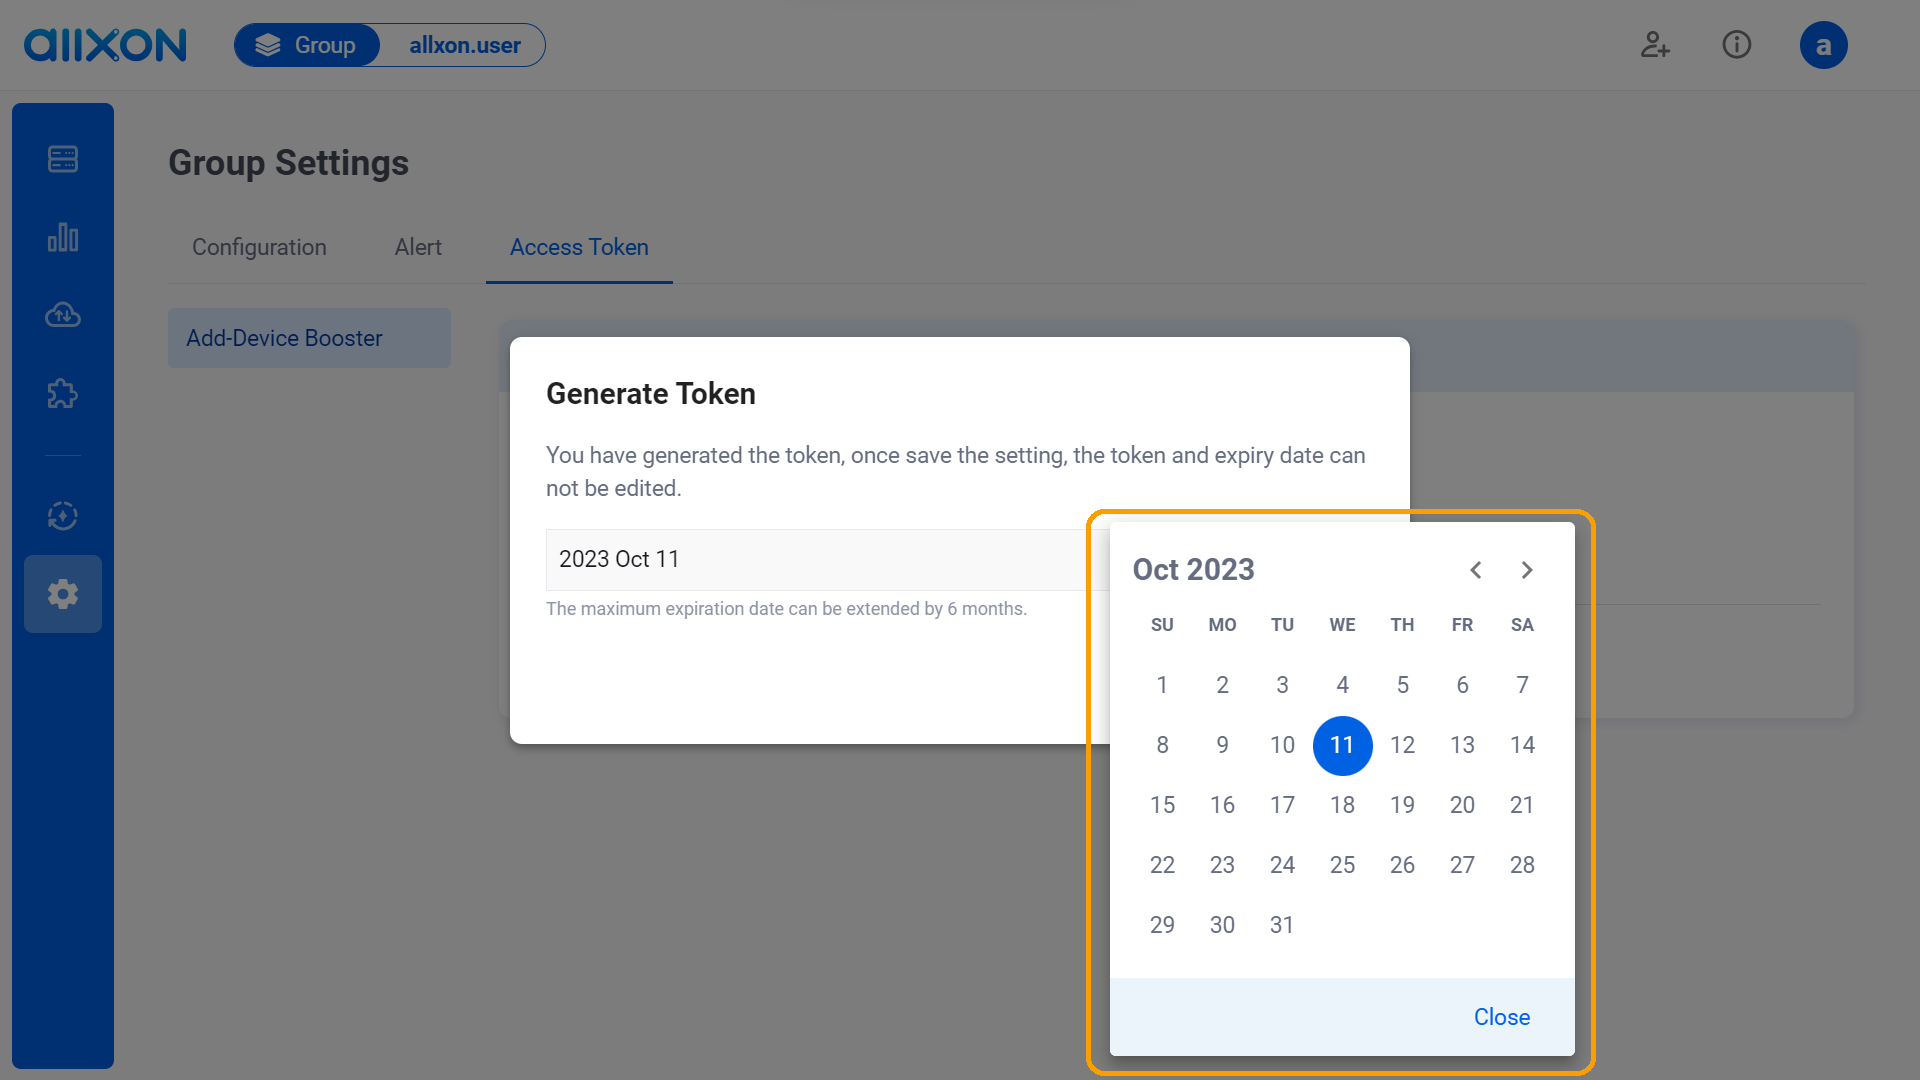
 icon on the right, then select the expiration date. Once selected, click on the Close button to close the window. (The expiration date can be extended by 6 months.)
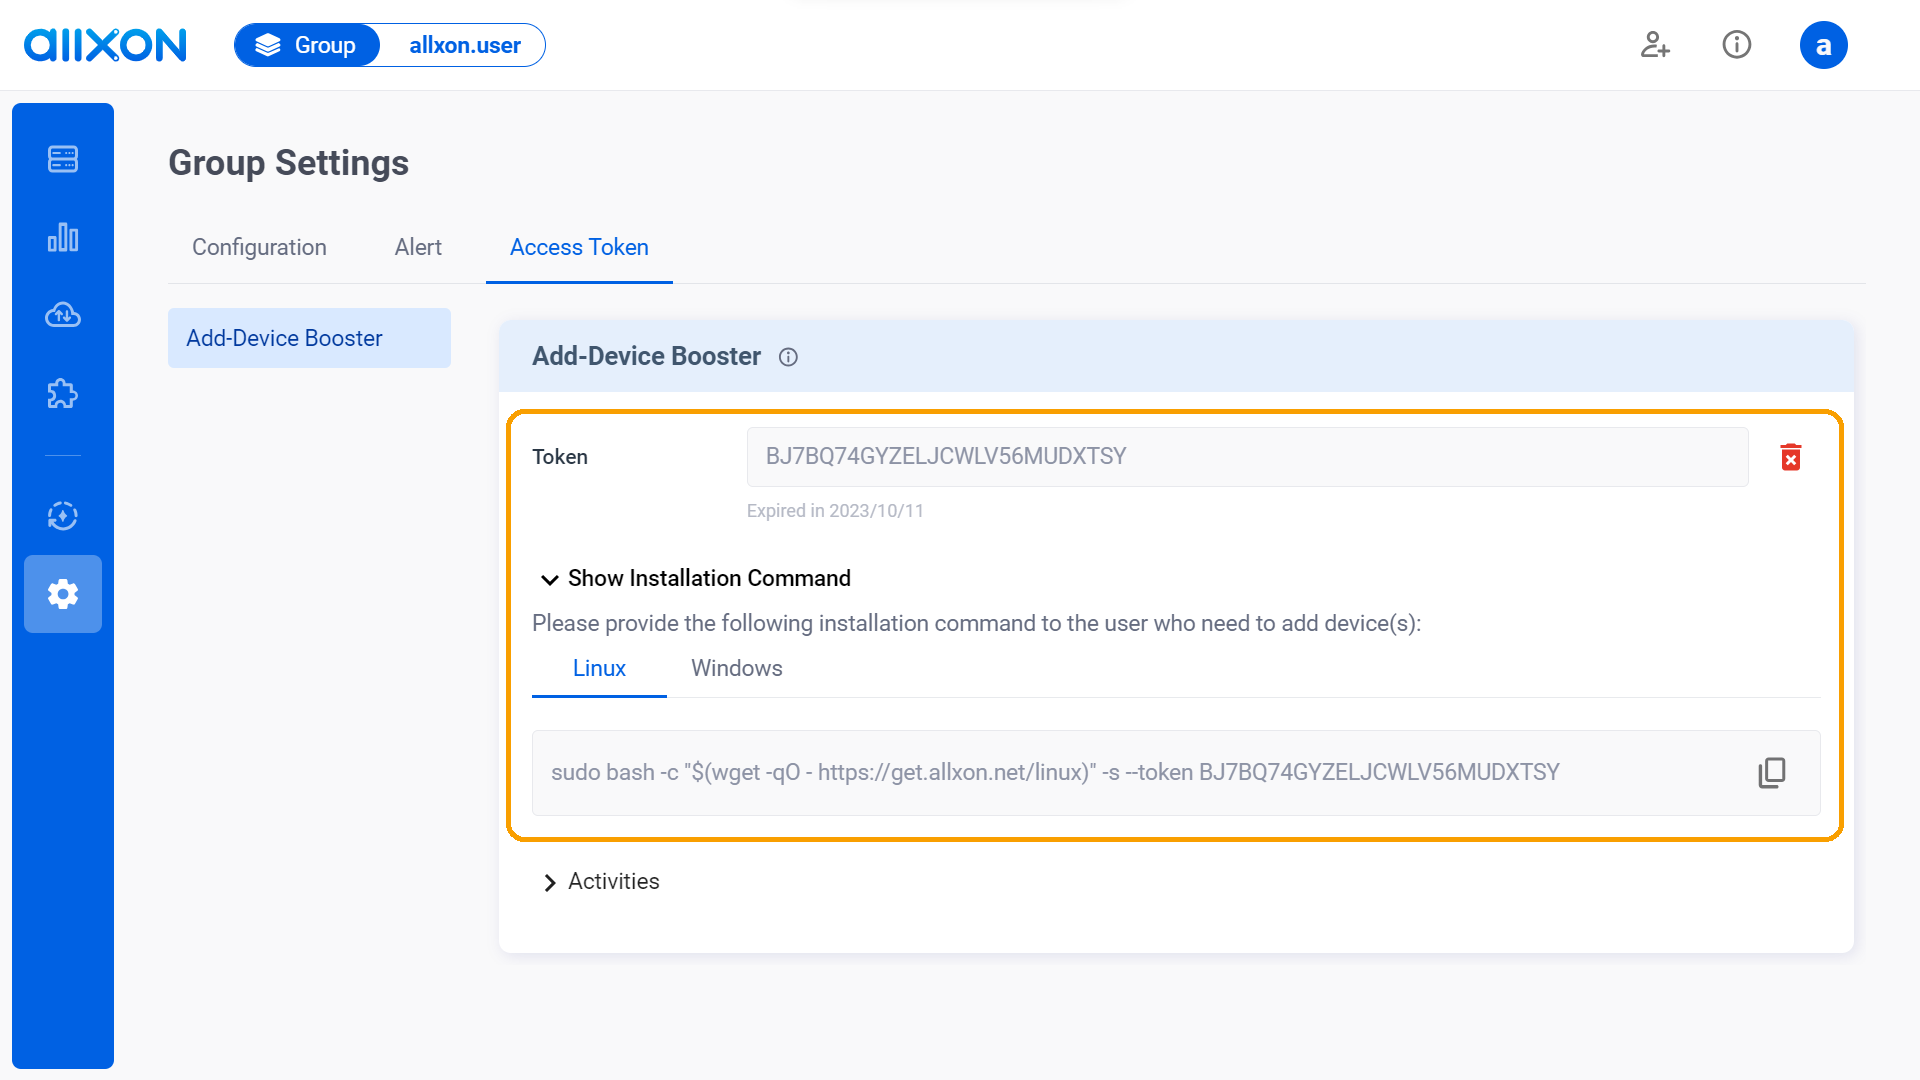
- Click on the drop-down arrow next to “Show Installation Command” after generating the token. Then, choose the Linux or Windows tab to reveal and provide the installation command to the user who needs to add a device.
- After completing these steps, you can click on the drop-down arrow next to "Activities" and filter through the "Date and Time" tab to view the history and details of edited activities.
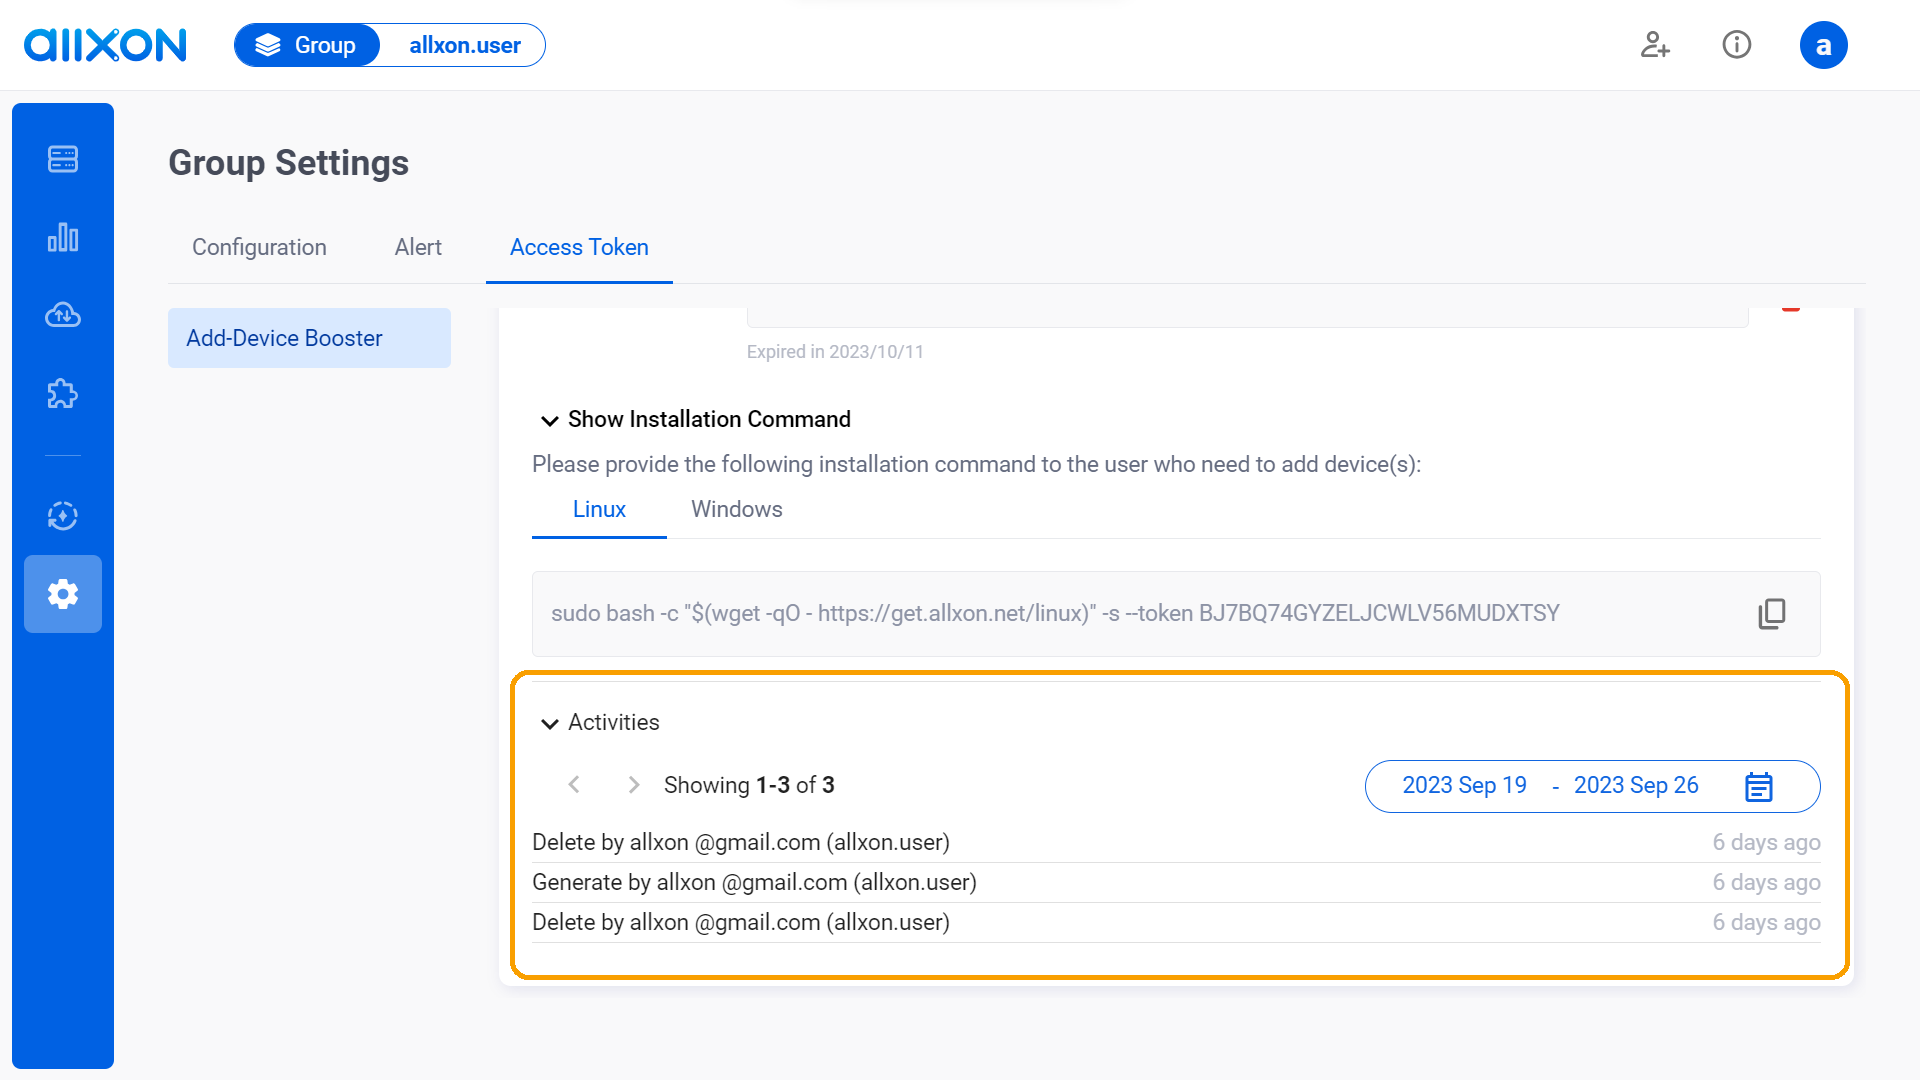
- Navigate to the Access Token Tab, select the Add-Device Booster card, and click on the + button to generate a token.
Step 2. Install Agent with your Add-Device Booster Command
On Linux OS
- Open the Terminal
- Paste and copy the installation command your generated (refer to Step 1-C):
sudo bash -c "$(wget -qO - https://get.allxon.net/linux)" -s --token "your Add-Device Booster token"On Windows OS
- Open the Terminal as an Admin
- Paste and copy the installation command your generated (refer to Step 1-C):
Set-ExecutionPolicy RemoteSigned -Scope Process -Force; Invoke-WebRequest -Uri "https://get.allxon.net/windows" -OutFile "$env:TEMP\allxon-installer.ps1"; & "$env:TEMP\allxon-installer.ps1" -token 'your Add-Device Booster token'
👉🏻 Learn more: Group Settings Interface
💡Note: If you are using Allxon Agent version lower than v3.02 or earlier, head over to the Set Group Policies for more information.
